How to create Dev Protocol Dapp (2/3)
Hello permalink
I would like to create a simple Dapp in 3 steps using the library provided by the Dev Protocol.
This is the second. If you haven't read the last time yet, please go back to 1st.
This time I would like to make a detailed page of the creator
- STEP01: Get creator information
- STEP02: Get token information
- STEP03: Get cover image of token
- STEP04: Code the detail page
Prepare the development environment permalink
We will continue to use the development environment that was used the first time.
For details, please check 1st
Overview of the detail page permalink
The page will create this time will be the creator details page that is transitioned from the creator list page. On the creator details page, the creator's information and the tokens possessed are displayed.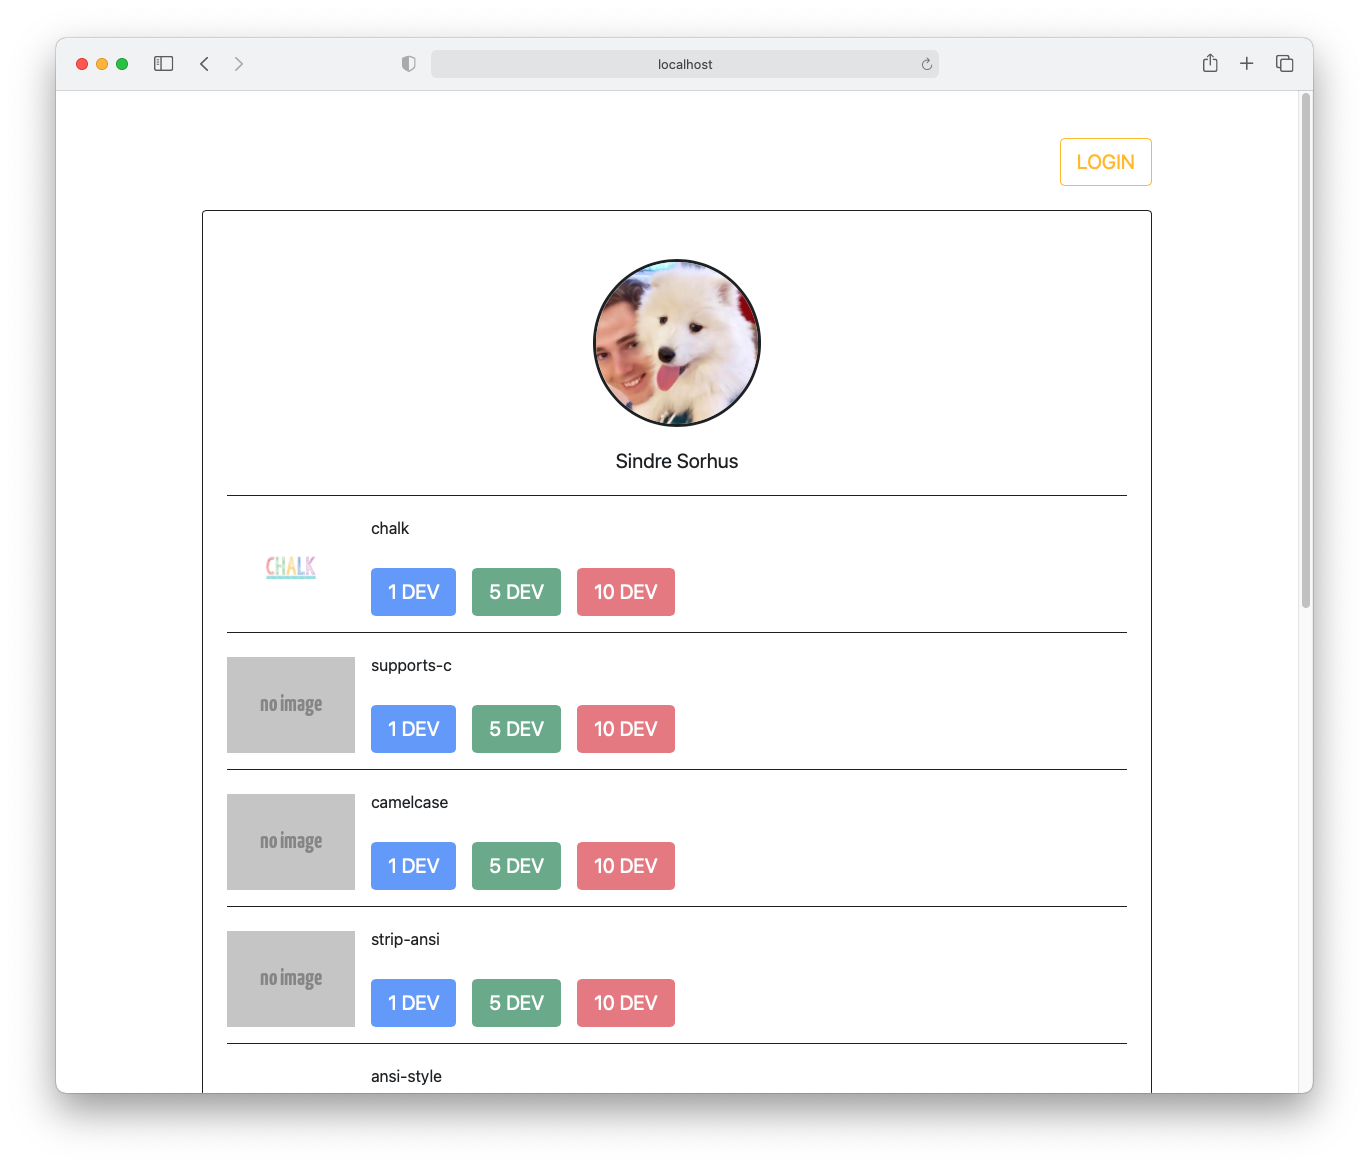
STEP01:Get creator information permalink
Creator information is got from dev-for-apps. The creator's address used to get it is added to the link URL from the index page
/**
 * Page transition from index with the following URL
 * https://localhost:3000/tokens.html?creator=xxxxx
 **/
const urlParams = new URLSearchParams(window.location.search);
const creator   = urlParams.get('creator')

const query_params = new URLSearchParams({
    address: creator,
});

const response = await fetch("https://dev-for-apps.azureedge.net/accounts?" + query_params, {
    method: "GET"
});

...
STEP02: Get token information permalink
The token information is got from the Data Viewer.
const response = await fetch("https://api.devprotocol.xyz/v1/graphql", {
        method: "POST",
        headers: {
            "X-Requested-With": "xhr",
            "Content-Type": "application/json",
        },
        body: JSON.stringify({
            query: `
                query Properties {
                    property_meta(where: {author: {_eq: "${address}"}}) {
                        property
                        author
                        name
                    }
                }
            `,
        }),
    });
STEP03: Get cover image of token permalink
In Data Viewer, the token cover image cannot be got, so it is got from dev-for-app.
const query_params = new URLSearchParams({
    address: address,
});

const response = await fetch("https://dev-for-apps.azureedge.net/properties?" + query_params, {
    method: "GET"
});
The acquired data is in the following JSON format.
[
    {
        "cover_image": {
            "url": "https://storageaccountdevfobc15.blob.core.windows.net/dev-for-apps-images/assets/d3e6c900_6a1b_11ea_91be_d87dfda8b8e7_36d483d5b7.jpg",
            ...
        },
        ...
    }
]
Various information other than this can be obtained, but here, the information other than those used on the details page is omitted.
STEP04: Code the detail page permalink
Code the detail page. Please code main.ts referring to the code below
window.addEventListener("load", async () => {
  /**
   * main.ts is called from both the list page and the detail page.
   * So you need to separate the processing for each
   */

  // Warning: The processing of the list page created in the first time moves to this if statement
  if (document.getElementById("page-index")) {

  }

  // Write the processing of the detail page from here
  if (document.getElementById("page-tokens")) {
    // Get the creator's address from the GET parameter of the URL
    const urlParams = new URLSearchParams(window.location.search);
    const creatorAddress = urlParams.get('creator');

    // Get creator information using dev-for-app
    const creatorInfo = await getCreatorInfo(creatorAddress);

    // Creating HTML to display creator information
    const profileElementString = `
        <img class="mb-4 rounded-circle border border-3 border-dark" src="${creatorInfo.portrait.url}" alt="creator image" width="168" height="168" style="object-fit: contain">
        <p class="mb-0 fs-5">${creatorInfo.name}</p>
    `

    const creatorHTMLElement = document.getElementById("creator");
    creatorHTMLElement.innerHTML = profileElementString;

    // Get HTML to display token information
    const tokensHTMLElement = document.getElementById("tokens");

    // Get the token list from Data Viewer
    for (const token of await getTokens(creatorAddress)) {
      // Get an image of the token
      const tokenInfo = await getPropertiesInfo(token.property)

      if (!tokenInfo) {
        continue
      }

      const image = tokenInfo.cover_image ? tokenInfo.cover_image.url : ""

      // Creating HTML to display token information
      const div = document.createElement('div');

      div.innerHTML = `
            <article class="mt-4 mb-3 d-flex">
                <img class="me-3" src="${image}" alt="token image" width="128" height="96" style="object-fit: contain">
                <div class="d-flex flex-column justify-content-between">
                   <p class="fs-6">${token.name}</p>
                   <div class="d-flex">
                        <button type="button" class="me-3 btn btn-lg btn-primary" address="${token.property}" amount="1">1 DEV</button>
                        <button type="button" class="me-3 btn btn-lg btn-success" address="${token.property}" amount="5">5 DEV</button>
                        <button type="button" class="btn btn-lg btn-danger" address="${token.property}" amount="10">10 DEV</button>
                   </div>
                </div>
            </article>
        `;

      const tokenHTMLElement = div.firstElementChild;

      // Add to tokens html
      tokensHTMLElement.appendChild(tokenHTMLElement)
    }
  }
});
The code from here is added below the above code. Or you can code it in another file and then import it.
async function getPropertiesInfo(address) {
    const query_params = new URLSearchParams({
        address: address,
    });

    const response = await fetch("https://dev-for-apps.azureedge.net/properties?" + query_params, {
        method: "GET"
    });

    const info = await response.json();

    if (!info[0]) {
        return
    }

    return info[0];
}
async function getTokens(creator) {
const response = await fetch("https://api.devprotocol.xyz/v1/graphql", {
method: "POST",
headers: {
"X-Requested-With": "xhr",
"Content-Type": "application/json",
},
body: JSON.stringify({
query: `
query Properties {
property_meta(where: {author: {_eq: "${creator}"}}) {
property
author
name
}
}
`,
}),
});
const json = await response.json();
return json.data.property_meta;
}With the coding so far and a few modifications, the page is complete.
You can check the source code of the completed version from the following
https://github.com/kazu80/tokener-find/tree/master/src
Summary permalink
This time, I got the token information that the creator has from Data Viewer, got the image of the token from dev-for-app, and made a detail page. You may be accustomed to using Data Viewer and dev-for-app.
Next time, I would like to process staking to tokens and create a connection with my wallet.
Thank you.
🌈 Was this helpful ?
In order to provide you with better contents in the future, please let us know your questions, feedbacks etc.🌱
▶ Post on Forum
- Dev Protocol releases all codes as OSS in public. Your contributions are welcome.(Sometimes there are bounties.)
▶ Dev Protocol GitHub
- DIP (Dev Improvement Proposal) process is also released. We’re looking forward to seeing your comments on it.🌟
▶ DIP URL